Tag Archives: OEDA

Doing an Exadata mixed cells config with OEDA

Earlier versions of OEDA didn’t allow you to have mixed cells in the configuration i.e. High Capacity (HC) and Extreme Flash (EF). The way to deal with that configuration was that deploy the system with either HC or EF cells and then manually configure the remaining cells.

I am not sure when did it change but the newer versions allow you have mixed type of cells in a single OEDA configuration. Once you select the hardware, there is an additional option called Enable Additional Storage, where you can select the other type of cells. The minimum number of cells has to be three to use this option. Also the cells that are at the bottom of the rack physically should be selected as main storage and the other cells should be added as additional storage as that is how OEDA builds the configuration files.

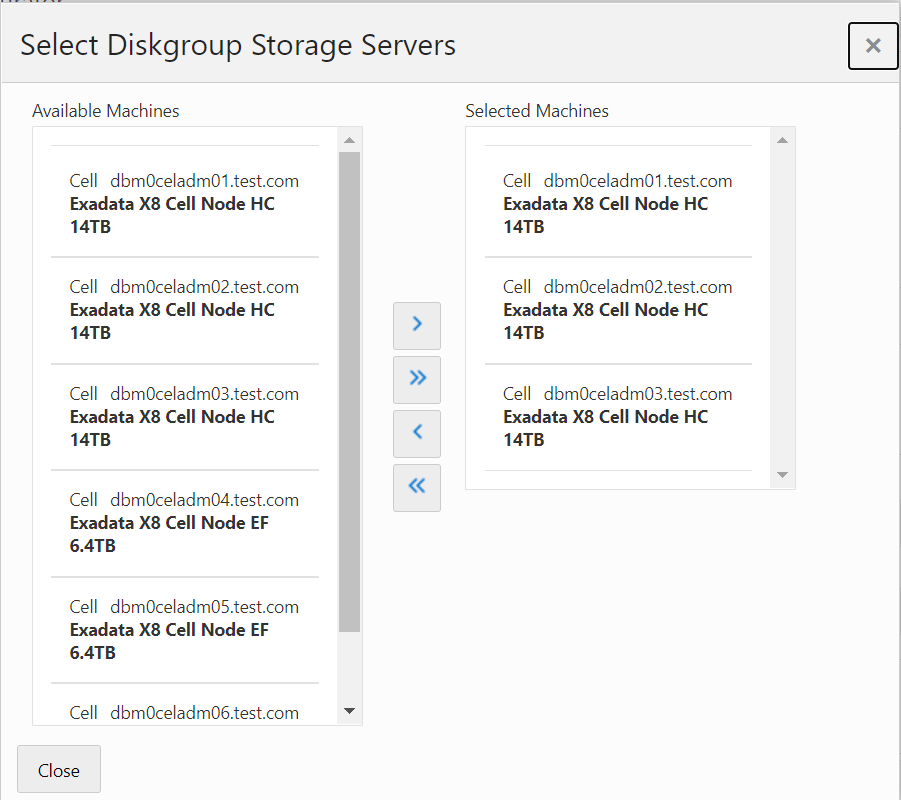
Once this is selected, on the Diskgroups screen, select Diskgroup layout as custom and you can create multiple diskgroups and select cells for each diskgroup (as EF & HC cells can’t be part of the same diskgroup).

Once the configuration is generated, it can be deployed with OneCommand without any manual intervention. A small feature but makes life easier by getting rid of all the manual steps.

New web based OEDA for Exadata

It started with an xls sheet (that was called dbm configurator) . Then OEDA (Oracle Exadata Deployment Assistant) was introduced that was a Java based GUI tool to enter all the information needed to configure an Exadata machine. Now with the latest patch released in Oct, OEDA has changed again; to become a web based tool. It is deployed on WebLogic and comes with some new features as well. SuperCluster deployments will continue to use the Java based OEDA tool.  The new interface has support for Exadata, ZDLRA and ExaCC. It is backward compatible and can import the XMLs generated by older versions of OEDA. Some of the new features include the ability to configure single instance homes, create more than 2 diskgroups, create more than 1 database homes and databases, allow ILOMs to have a different subnet etc.

To configure the OEDA application you need to unzip the contents and run the installWls script with -p switch (that mentions the port). It will deploy the application on WebLogic and give you the URL to access the OEDA. The interface is similar to the older version. Just that it runs in a browser and there are some new features added. MOS note 2460104.1 and the Exadata documentation has more details:

Using Oracle Exadata Deployment Assistant


OEDA–Things to keep an eye on

So if you are filling an OEDA for Exadata deployment there are few things you should take care of. Most of the screens are self explanatory but there are some bits where one should focus little more. I am running the Aug version of it and the screenshots below are from that version.

  1. On the Define customer networks screen, the client network is the actual network where your data is going to flow. So typically it is going to be bonded (for high availability) and depending upon the network in your data center you have to select one out of 1/10 G copper and 10 G optical.

    image

  2. If you are going to use trunk VLANs for your client network, remember to enabled it by clicking the Advanced button and then entering the relevant VLAN id.
  3. image

    Also if it is going to be an OVM configuration, you may want to have different VMs in different VLAN segments. It will allow you to change VLAN ids for individual VMs on the respective cluster screens like below

    image

  4. If all the cores aren’t licensed remember to enable Capacity on Demand (COD) on the Identify Compute node OS screen.
  5. image

  6. On the Define clusters screen make sure that you enter a unique (across your environment) cluster name.

    image

  7. The cluster details screen captures some of the most important details like
    1. Whether you want to have flash cache in WriteBack mode instead of WriteThrough
    2. Whether you want to have a role separated install or want to install both GI and Oracle binaries with oracle user itself.
    3. GI & Database versions and home for binaries. Always good to leave it at the Oracle recommended values as that makes the future maintenance easy and less painful.
    4. Disk Group names, redundancy and the space allocation.
    5. Default database name and type (OLTP or DW).

      image

Of course it is important to carefully fill the information in all the screens but the above ones are some of them which should be filled very carefully after capturing the required information from other teams, if needed.